![Hướng dẫn cài đặt OpenGL trên DevC++ Hướng dẫn cài đặt OpenGL trên DevC++](http://blog.ntechdevelopers.com/wp-content/uploads/2020/12/Picture1.png)
Hướng dẫn cài đặt OpenGL trên DevC++
December 30, 2020Chuẩn bị :+ Dev-C++ 5.4.0 or hơn , glut.3.7.6+
![](http://blog.ntechdevelopers.com/wp-content/uploads/2020/12/Picture1.png)
1. Mở DevC. Tool -> Package Manager
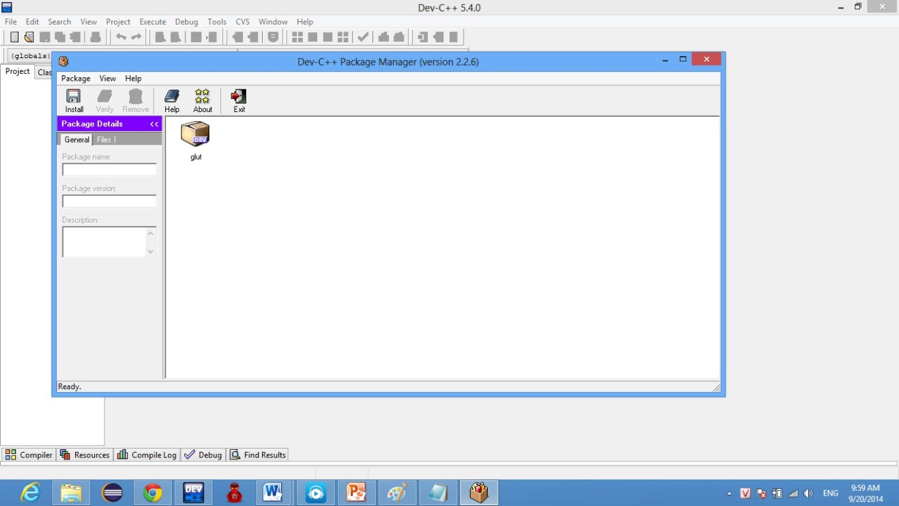
![](http://blog.ntechdevelopers.com/wp-content/uploads/2020/12/Picture2.png)
2. Kích vào install
![](http://blog.ntechdevelopers.com/wp-content/uploads/2020/12/Picture3.png)
3. Nhấn Open và bắt đầu install nó.
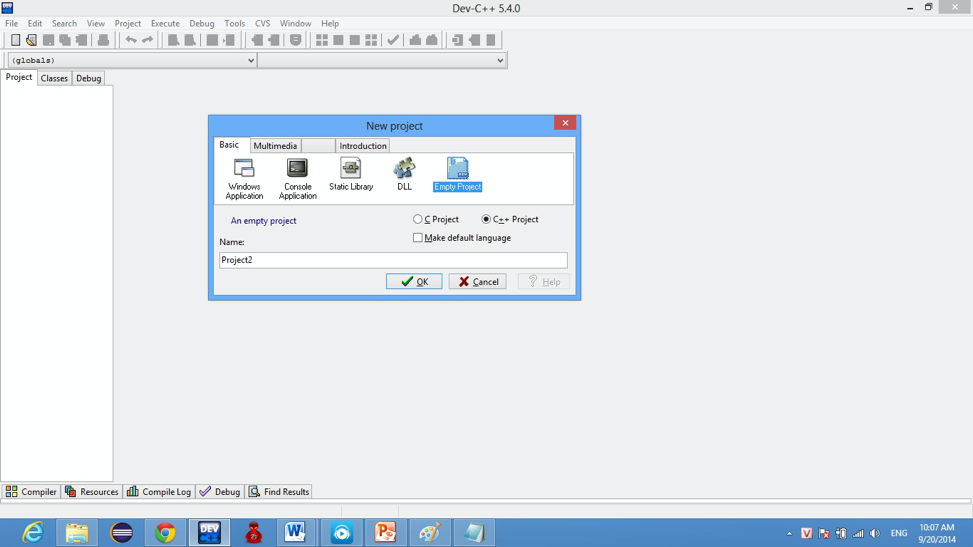
4. Mở DevC. File -> New -> Project -> Empty Project -> OK.
![](http://blog.ntechdevelopers.com/wp-content/uploads/2020/12/Picture4.png)
5. Chọn tab Project -> project options. Chọn tab: Parameters. Trong mục Linker điền: -lglut32 -lglu32 -lopengl32 -lwinmm -lgdi32
![](http://blog.ntechdevelopers.com/wp-content/uploads/2020/12/Picture5.png)
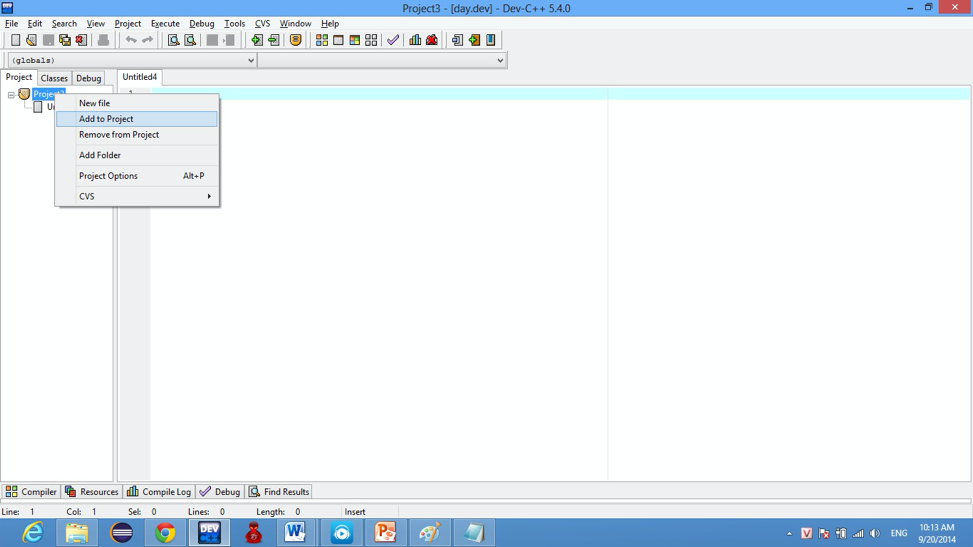
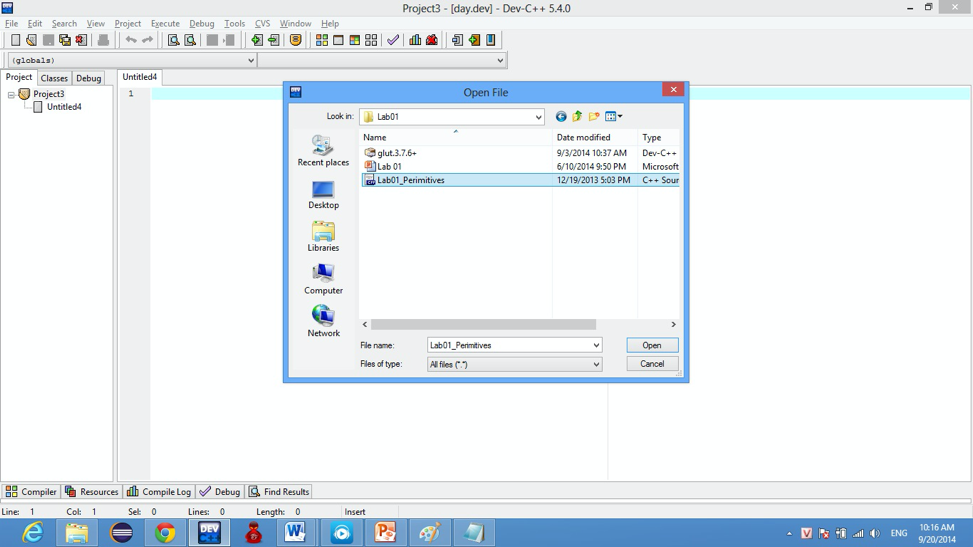
6. OK. Tiếp theo chuột phải vào biểu tượng project góc phải màn hình add to Project:
![](http://blog.ntechdevelopers.com/wp-content/uploads/2020/12/Picture6.png)
7. Chon file Lab01_Perimitives.cpp -> Ok bắt đầu chạy.
![](http://blog.ntechdevelopers.com/wp-content/uploads/2020/12/Picture7.png)
Tải thư viện tại đây
# http://megaurl.in/9FXXFs41
DevC++ các version
# http://megaurl.in/I91C